Tuesday, July 21, 2009

Season 2009 - Week 7 - Recipe Red Cabbage & Apple


· 1 small red cabbage

· 25g butter

· 1 large onion, finely sliced

· ½ tsp ground allspice

· ¼ tsp freshly grated nutmeg

· 1 Apple, peeled, cored and grated

· 4 tbsp red wine vinegar

· 2 tbsp light muscovado sugar

· 2 tbsp redcurrant jelly

Finely slice the cabbage, discarding the core and any tough pieces. Melt the butter in a pan with a tight-fitting lid over a medium heat. Cook the onion uncovered for 5 minutes until soft but not browned.


Stir in the spices then add the cabbage, apple, red wine vinegar and sugar plus 100ml cold water. Stir until thoroughly mixed and the sugar has dissolved. Season generously.

Bring to the boil, then cover tightly and simmer for about 1 hour, stirring occasionally, until the cabbage is very tender and the liquid has evaporated. Stir in the redcurrant jelly, allow to melt, then serve.


Season 2009 - Week 7 - About Red Cabbage

The red cabbage (Brassica oleracea var. capitata f. rubra) is a sort of cabbage, also known as Red Kraut or Blue Kraut after preparation. Its leaves are coloured dark red/purple. However, the plant changes its colour according to the pH value of the soil, due to a pigment called anthocyanin.

On acidic soils, the leaves grow more reddish while an alkaline soil will produce rather greenish-yellow coloured cabbages. This explains the fact that the very same plant is known by different colours in various regions. Furthermore, the juice of red cabbage can be used as a home-made pH indicator, turning red in acid and blue in basic solutions. It can be found in Northern Europe, throughout the Americas, and in China.


On cooking, red cabbage will normally turn blue. To retain the red colour it is necessary to add vinegar or acidic fruit to the pot.

Red cabbage needs well fertilized soil and sufficient humidity to grow. It is a seasonal plant which is seeded in spring and harvested in late fall. Red cabbage is a better keeper than its "white" relatives and does not need to be converted to sauerkraut to last the winter.

Season 2009 - Week 7 - Recipe Cucumber Raita


  • 1 medium cucumber
  • 1 teaspoon cumin seeds
  • 2 cups plain, whole-milk yogurt
  • 1 clove garlic, peeled and minced
  • 2 tablespoons fresh coriander or mint leaves, chopped
  • cayenne or paprika to garnish

Peel cucumber. Cut lengthwise into 1/4-inch strips, then into thin slices crosswise. Blot off moisture with paper towels. Toast cumin seeds for a few seconds in a small, heavy frying pan over high heat. In a bowl, stir yogurt until it is smooth. Mix it with the cumin, garlic and coriander or mint leaves. Combine mixture with cucumber slivers, sprinkle with cayenne or paprika, and chill before serving.


Season 2009 - Week 7 - Pistil Farm Flowers


Dear Pistil Farm Member

Thank you for supporting my farm in its first season! I am so happy to be growing colourful energetic flowers to brighten your urban habitat.

These flowers are grown organically in Tivoli, New York (right next to Hearty Roots). To find out more about the varieties you’ll be receiving go to Pistil Farm. At the website you can also order extra bouquets for special gifts and people. Any questions just email pistilfarm@gmail.com.

Thanks Again!! Lindsey


Season 2009 - Week 7 - Awesome Farm Chickens


This Saturday marks the second delivery of Awesome Farm chickens to Brooklyn. The chickens will be available for pick up between 11-1 at the Red Shed Garden.
There will be a few extra chickens available if you or someone you know is interested in purchasing a bird on the spot. Please bring a cash or check, and a bag or cooler to carry them home in.

Heres some Roast Chicken Ideas:-

Roast Chicken with Chili & Basil from Ottolenghi
Nigel Slaters Best Roast Chicken ever!

Forgive the UK slant this week!!

Season 2009 - Week 7 - Notes from Montgomery Place Orchard

This week our fruit variety supply is a little short. We know that you will be getting blueberries but cherry and black raspberry season have come to an end and the plums and apricots are ‘teasing’ us but not quite ready. We are hoping to be able to pick just enough apricots for you tomorrow morning. Peaches are just around the corner and they look really good right now.

Because we cannot send you three kinds of fruit this week, we are sending you some of our “Orchard Blossom” honey. We have 10 bee hives in our orchards year round. Every spring we have about 1200 kindergarten children visit our farm to learn about the honey bee and its importance in pollination. All of our fruit (and many vegetables) start out as a fruit blossom. These must be pollinated and the honey bee is the best at getting this done. I explain to the children if not for honey bees, there would be no apples, pears, strawberries, zucchini, melons, … I then talk about a crop called cotton that is also pollinated by bees and I explain to the children that my clothes (even my underwear) is made from cotton and if not for the honey bees we would all be hungry and have no clothes on. This, of course, makes them giggle but also helps them understand how important the honey bee is to us. A bee hive is an amazing thing. In the summer months one hive may have 60,000 bees. There is one queen bee, several hundred
drones (male bees), and all the rest are female worker bees. Every bee has a job to do in the hive. A queen may live up to 5 years and may lay 1200 eggs/day. Drones are there only for fertilizing the queen. They have no stinger and cannot feed themselves. They pretty much just sit around the hive and drink nectar. But, in the winter, drones are forced out of the hive. The ‘worker’ bees are female and they do all the work; house cleaning, nurse bees, house builder bees, fan bees, scout bees, guard bees, and finally collector bees. One honey bee lives about 6 weeks in the summer and produces about ½ teaspoon honey in that life span. Honey bees make honey to survive through winter months. They are very industrious and make way more
than they need so we ‘STEAL’ that extra honey. We average about 60 pounds of honey/hive.

Honey can taste different and is dependent upon what the bee was foraging. The lighter the honey, the lighter the flavor. We call ours orchard blossom because the bees gather from whatever is in blossom; apples, peaches, zucchini, wildflowers, etc. We hope you enjoy the work of our honey bees in their pollinated fruit and this week in their honey.

Last year we did not pick ONE apricot. They bloom in late April and often are frozen out by a spring frost. This year there are TOO many. When they were the size of grapes, we had to ‘thin’ the fruit so it was about 3-5” apart. (We do this with peaches too). If there is
too much fruit on a tree, the energy of the tree is spread out over all that fruit and the quality is not as good as if there is less fruit. This year the birds seem to be really enjoying the apricots.
We have a special machine set up in the orchard that sends out bird distress calls and seems to be helping keep the birds away. We hope you like the apricots as much as the birds do.

Thank you, Doug and Talea Fincke and everyone at Montgomery Place Orchards

Season 2009 - Week 7 - Notes from the Farm by Luke Deikis

Working on a vegetable farm, I live in kind of a vacuum half the year. I make an effort to be in touch with our non-farm friends, to have some contact with the outside world… but the reality is, once the season really gets swinging about the only news I hear are 15 second blips on the truck radio as I drive produce from the field to the cooler. I’m instead tuned into this farmer world of weather and soil, complete with its own peculiar national news and issues. As you may know, a number of our agricultural pests and sicknesses in the northeast overwinter down south and blow up in the summer storms, keenly watched by farmers and growers. This year, the two worlds have crossed a little.

In the 1840s, the Irish Potato Famine killed about a million people in a country of about 8 million. There were various causes that made the Irish so vulnerable, but there was only one villain for the potatoes: Phytophthora infestans, aka Late Blight, the villain of our story. Late Blight is a nasty fungal sickness, spread by spores in the air, that affects tomatoes and potatoes and a few of their cousins. A spore lands on a plant, creates a little black lesion, and within a few days that lesion produces several hundred thousand new spores, which disperse to infect new plants. A single infected plant will produce literally millions of spores in a weekend. The sick plant withers and dies, usually in several days, followed by all his neighbors. Unchecked, a healthy field of tomatoes can be dead in two weeks. There is no cure; there is only death.

Late Blight spores more or less need living plant matter to survive… which means here in the northeast, they die each winter unless they’re allowed to survive in sick potato tubers that were not destroyed, or in greenhouses, etc. Good management means we can be free of the disease in the early part of the season… but later on there is always the risk of it blowing up in storms, or from neighboring gardens or farms. And organic growers have very few tools against fungal diseases—it pretty much begins and ends with copper, a tool many of us aren’t thrilled to use to begin with… and in the best of cases, copper only delays the onset of Late Blight once the pathogen is in your field—it’s just not strong enough to totally shield your plants. And it rinses off in the rain. So you can easily see why, with a disease that you can only vainly defend yourself from, and which will almost surely destroy your entire yield, farmers are a bit edgy about Late Blight.

Which brings me to the intersection of this farmer world and the regular world—This year, during what was already the worst conditions for late blight in a long time (week after week after week of cool rain), a wholesale seedling grower shipped out thousands and thousands of infected tomato seedlings to big box stores like Lowes and Home Depot all over the eastern seaboard. It’s kind of like when a massive decentralized meat industry makes people sick all over the country, except the plants are dying this time. The company taking the rap is Bonnie Plants, from Alabama, but it hardly matters. This has created the earliest and broadest outbreak of Late Blight ever, all over the northeastern USA. Weeks earlier than the usual scattered cases, we’re seeing it reported in nearly every county in New York. As I’ve watched reports of the disease coming in, I’ve slowly become aware of it getting covered in the regular news, too. So hi there, real world—nice to see you midsummer for a change, sorry it’s under such rough circumstances.

At Hearty Roots we’re scouting closely for the disease, hoping it will miss us. We have friends further north who have already begun cutting out sick plants by the hundreds, hoping to eradicate hot spots before the whole field goes. Miriam is spraying copper and keeping a close eye on the situation, and the rest of have our fingers crossed—we love tomatoes and want to eat them! So say a little prayer, and if you’re a home gardener with tomatoes, PLEASE—spend a moment to google this if you’re not in the loop already, and make sure your garden isn’t serving as a stopover for spores on their way further afield.

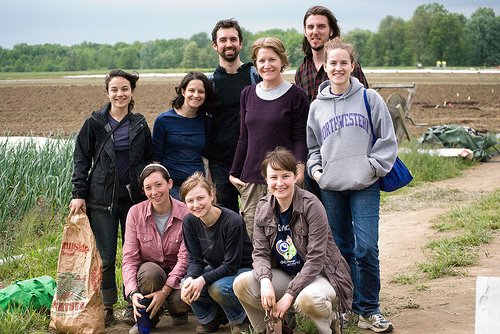
This is Lukes first year at Hearty Roots!

Season 2009 - Week 7 - Produce List

  • Lettuce
  • Red cabbage
  • Carrots
  • Herb choice
  • Japanese turnips
  • Scallions
  • Cucumbers

Saturday, July 11, 2009

Season 2009 - Week 6 - Fruit Share starts


Season 2009 - Week 6 - Recipe So simple Squash Frittata


Non Stick pan, 6 baby squash & zucchini, 1/2 tbsp oil, 5 eggs, lemon thyme, salt & pepper,

Gently sauté the squash and zucchini with the oil, until soft. Beat the eggs together, add lemon thyme, salt and pepper. Evenly distribute the squash in the pan and add the egg mixture. Cook on a medium flame until egg is set and starting to brown, slip under broiler to brown top. Once done slide onto a plate and let cool.

Season 2009 - Week 6 - Recipe Chioggia Beets with Raspberry Mint


  • 1 lb beets (4 to 6; preferably Chioggia*), 1 inch of stems left intact
  • 3 tablespoons thinly sliced scallions
  • 2 to 2 1/2 tablespoons raspberry vinegar
  • 2 teaspoons fresh lemon juice, or to taste
  • 2 tablespoons chopped fresh mint
  • 1 tablespoon finely grated fresh orange zest (from 2 oranges)
  • 1/2 teaspoon salt
  • 1/2 teaspoon black pepper
  • 1/4 cup olive oil
  • Garnish: fresh mint sprigs

Preparation

Cover beets with water by 1 inch in a 2- to 3-quart saucepan and simmer until tender when pierced in center with a fork, about 30 minutes. Drain in a colander and rinse under cold running water. Let stand until cool enough to handle, then slip off and discard skins. Cut beets into 1/4-inch-thick slices.

While beets are cooking, stir together scallions, 2 tablespoons vinegar, lemon juice to taste, mint, zest, salt, and pepper in a bowl. Add oil in a slow stream, whisking until combined. Add warm beets and toss with vinaigrette and vinegar and salt to taste. Serve warm or slightly chilled.

*Sometimes called candy-cane beets, chioggias become more aggressive in flavor as they age, so search out relatively young beets, with a diameter of 1 1/2 to 2 inches.

Season 2009 - Week 6 - Recipe Baked Chioggia Beet Chips


* 2 medium beets with stems trimmed to 1 inch
* 1 cup water
* 1 Tablespoon canola oil
* Sea salt

Peel beets with a vegetable peeler, then slice thinly (but not too thinly) with mandolin or sharp knife, using stems as handles.

Bring water to a boil in a saucepan. Add beets, then remove pan from heat and let stand 15 minutes. Drain beets in a colander, discarding liquid, then let stand in colander 15 minutes more. Toss beets with oil and salt.

Put oven rack in middle position and preheat oven to 225°F.

Line a shallow baking pan with nonstick liner, then arrange beet slices snugly in 1 layer. Bake beets until dry, about 45 minutes to 1 hour. Immediately transfer chips to a rack to cool (chips will crisp as they cool).

Season 2009 - Week 6 - Produce List

  • Head lettuce
  • Green kale
  • Chioggia beets
  • Parsley
  • Scallions
  • Squash
  • Radishes
For those who purchased a fruit share:

  • sour cherries
  • blueberries
  • black raspberries

Season 2009 - Week 6 - Notes from Montgomery Place Orchard

Of course we hope that you enjoy your first fruit share from Montgomery Place Orchards. If you would like to see some pictures of our farm, please visit montgomeryplaceorchards.blogspot.com. If you have any questions or concerns, please do not hesitate to call or e-mail us.

Your fruit this week includes black raspberries, blueberries, and sour cherries.

Sour cherries are also referred to as tart, red cherries, or pie cherries and are usually not eaten fresh but used in recipes. Because they are so perishable and the season is so short, you never see these sold fresh in a super market. Please refrigerate the cherries immediately and use within 2 days. You can freeze them by spreading them out on a cookie sheet and freezing for a few hours and then place them in freezer quality plastic bags.

Sour Cherry Sauce (makes about 2 ½ cups)

3 T brown sugar

1 T cider vinegar

3 t corn starch

1 t vanilla extract

½ t. ground cinnamon

1 pint fresh red sour cherries pitted

1 cup apple juice


Combine brown sugar, cornstarch, and cinnamon in a medium saucepan. Mix in apple juice, cider vinegar and vanilla extract. Cook over medium heat until thickened. Cook for another 2 minutes. Stir in red sour cherries and heat thoroughly. Serve warm with ham or pork or spoon over dishes of ice cream for dessert.

The term ‘true blue’ has to come from blueberries. They are such a wonderful, dependable fruit. They are a little picky about what soil they grow in but that is about it. They bloom late enough that we don’t have to worry about spring frosts, too much rain doesn’t seem to bother them and too much sun just makes them sweeter. The season is just about the entire month of July, so plan on eating some more of these next week.

This week our farm has been ‘in the black’. We always feel like we have been hit by a black raspberry tsunami the first week of July. But, we love it. EVERYONE”S hands are black from working with black raspberries. They are being harvested every day and then turned into jam or vinegar. Everyone’s teeth are black from eating soo many. This season is short though, usually only 10 days so like us, enjoy them while you can.

We have learned as farmers that we can do everything right but in the end fruit is just a gift from Mother Nature. We hope you enjoy our harvest as much as we do.

Doug and Talea Fincke and everyone at Montgomery Place Orchards

Season 2009 - Week 6 - Notes from the Farm by Devin Dinihanian

This is Devin's first year at Hearty Roots and first year living on the East Coast.

As chief officer of irrigation, my jobs included many things, until of 2 weeks ago. I was responsible for laying lengths of fire hose along the road which bisects the fields at Grieg Farm, connecting it to 3 inch lie flat hose, and on to the 2 inch, header tape and finally connecting the drip tape to the whole system. I had boxes of threaded connectors and hose clamps at my disposal, as well as 3 pumps set up along the sides of two irrigation ponds on the properties. We had mapped out all the different beds that needed watering, the squash and melons, the eggplant and the peppers, the tomatoes, leeks and onions, using a sophisticated graphing program which we carried around on our digital wristband communicators which were disguised as mead spiral note books. Everything was going just as planned, until the unexpected shifts in global climate weather patterns threw us entirely for a loop.

And in our line of work, loops are not always that great.

The week of June 7th saw sudden thunder storms, fields under the siege of rain clouds and mud filled trenches. When the week ended, we had 3.09 inches of rainwater to deal with. The turtles in the pond loved it, but my irrigation lines were stuck without a paycheck. The next week we got hit again by these lightning rich thunder and rain clouds, as huge systems of weather spun in from who knows where. (I tried to look it up, but just kept getting routed to a netflix page). That week we got 3.60 inches. Incredible. I knew my rain gear was going to come in handy, but I didn't realize it was to become my permanent uniform.

Irrigation work was not the only thing that suffered because of these storms. Our infantry saw legions of weeds growing everywhere on the farm, given strength by the water and taking the opportunity to thrive during our inability to cultivate effectively. We spent days on the ground, pulling crab grass clusters out of the garlic, and lamb's quarters out of the root vegetables. Two more weeks of torrential wet weather followed. As of today we have had 11 inches of rain since the 7th.

Things are still growing, and we are still harvesting, but everyone wants to know when this weather will end. An impossible to answer question. Unless you can see into the future. Which I can't do. Yet. Just going to go back to my irrigation lines, set up the infrastructure for when the dry season does arrive, and hope that the drip tape doesn't lose its edge.

Sunday, July 5, 2009

Season 2009 - Week 5 - Recipe - Grilled Summer Squash


  • 4 medium-large zucchini, trimmed, halved lengthwise
  • 4 medium-large yellow crookneck squash, trimmed, halved lengthwise
  • 5 tablespoons olive oil
  • 1/2 cup chopped fresh basil
  • 1/3 cup freshly grated Parmesan cheese (about 1 ounce)
  • 2 tablespoons balsamic vinegar

Prepare barbecue (medium heat). Place zucchini and crookneck squash on large baking sheet; brush all over with 3 tablespoons oil.
Sprinkle with salt and pepper. Grill vegetables until tender and brown, turning occasionally, about 10 minutes. Transfer to plate and cool
Cut vegetables diagonally into 1-inch-wide pieces. Place in large bowl.
Add basil, Parmesan cheese, balsamic vinegar and remaining 2 tablespoons oil and toss to blend. Season to taste with salt and pepper and serve.

Season 2009 - Week 5 - Recipe - Beet Dip or Soup


INGREDIENTS

  • 1 tsp black pepper (or to taste)
  • 1 tsp cumin (or to taste)
  • 1 big clove of garlic or several smaller ones
  • 2 lbs of steamed beets, cleaned and sliced
  • Coconut milk - approximately 1/2 cup to 1 cup, depending on the consistency of dip or soup you desire

If pepper and cumin already ground, mix them together. Otherwise, grind the two spices together.

Put beets and garlic in a blender or VitaMix.

Add as muchcoconut milk as it takes to cover the beets, then blend them together.

Add spice mixture and blend some more.

FOR SOUP: Add water. Serve with swirls of coconut milk and sprigs of cilantro or mint or parsley.


From Haramara retreat - http://www.haramararetreat.com


Season 2009 - Week 5 - Upcoming event

Season 2009 - Week 5 - Farm Notes from Cara Fraver

As Margaret illuminated last week, many of us on the Hearty Roots crew have been assigned “areas of specialization”. She’s the “Reemay Queen” and I’m in charge of the greenhouse. (I like to think “Greenhouse Guru” which has great alliteration and is a little tongue in cheek about my level of knowledge.) Last year during our inaugural year of farm work after leaving the city, my partner Luke and I worked on a farm in Columbia County. There I was also in charge of watering, seeding and other aspects of greenhouse production. This year I’m happy to be honing those skills.

Greenhouse management can seem fairly simple. You may have grown seedlings at home on a windowsill and had them grow wonderfully. When we were home gardeners, we started seeds in yogurt containers like kindergartners. Many of them grew happily and fed us for months. Some of them did not grow at all. Now I have a much better idea of why some of those seeds did not germinate. Water, humidity, soil temperature and light all affect how well seeds germinate and how well seedlings grow. Celery seeds want to be 70 degrees, but cooler than 60 at night. Corn, on the other hand, germinates at 95 degrees and it happy up to 105. Even watering, which in my pre-farm life seemed so basic, feels impossible to do perfectly. I’m aiming to have plants that are evenly wet but dry enough between waterings to keep down algae. Also, I have to be careful not to over-water, which can lead to the valuable minerals in their small soil blocks leeching away. These are small details, but they can make a difference in the health of our seedlings, eventually putting more food on your dinner table. Plus, doing this kind of work well and efficiently feels like a challenge that I’m going to spend the rest of my farming career trying to improve.

The greenhouse is a sweet separate zone of the farm in many ways. At Hearty Roots our greenhouse is kindly donated by a local school and so it is literally separate, located a mile or so from our fields. Some days the greenhouse feels like a haven—dry, warm and either peaceful or rockin’, depending on my daily decision regarding the radio. Other days it is a chore to remember and its separateness is frustrating; when we have a busy harvest day, taking time in the morning to drive there and water or move flats means that we are short one harvester. As the weather gets hotter, the humid air of the greenhouse is uncomfortable and I try to make sure that I seed in the morning when it is cooler. Nonetheless, it is always a pleasure to walk through the door and see all the seedlings and run my hand over a grassy flat of corn or check on lettuce as it starts to sprout. When I look over the full greenhouse, I often think of the dual uses of the word nursery and feel strangely protective over these tiny plants I’ve grown.

Season 2009 - Week 5 - Produce Highlight - Radicchio

It is actually Italian Chicory. Some (the popular) varieties includes radicchio di Verona which looks like a small head of red lettuce and radicchio di Treviso that looks a bit like a red version of Belgium Endive. This vegetable is very popular in Italy and has gained in popularity in the United States in the last few years. It is eaten raw with just a bit of olive oil and salt, as well as mixed into a variety of salads. You may also see it on menus grilled or roasted or combined into other dishes such as risotto.

How to store

For freshly picked heads simply brush any dirt off the exterior and put in a plastic bag and place in the refrigerator. It will keep approximately a week. When you are ready to use the leaves simply pull the leaves off the head and rinse in cool water.

Balsamic-Marinated Radicchio with Fresh Ricotta
  • 2 tablespoons balsamic vinegar
  • 5 garlic cloves, smashed
  • 1 teaspoon fresh lemon juice
  • 1/2 cup plus 2 tablespoon extra-virgin olive oil, divided, plus additional for drizzling
  • 1 pound radicchio (preferably Treviso), quartered lengthwise, or regular radicchio, cut into 2-inch wedges
  • 1/2 cup basil leaves
  • 1/2 pound fresh ricotta

Preparation

Preheat broiler.

Whisk together vinegar, garlic, lemon juice, 1/2 cup oil, and 1/2 teaspoon each of salt and pepper in a large bowl.

Put radicchio in a 4-sided sheet pan and toss with remaining 2 tablespoons oil. Broil 5 to 6 inches from heat, turning occasionally, until slightly wilted, 3 to 4 minutes.

Add hot radicchio to balsamic marinade and gently toss to coat. Cover bowl (to keep heat in) and marinate, tossing once or twice, at least 1 hour.

Transfer radicchio to a serving dish, pouring some of marinade over top. Scatter basil over radicchio. Drizzle ricotta with oil in a small bowl and serve with radicchio.

Season 2009 - Week 5 - Produce List

  • Lettuce
  • Lacinata kale
  • Beets
  • Popcorn
  • Summer squash
  • Basil
  • Radicchio

Thursday, July 2, 2009

Season 2009 - Week 4 - Recipe - Carrot Dip


INGREDIENTS
2 lbs. of steamed carrots
1/4 cup lime juice
1 tbs. of salt
1/2 cup (or more) of sunflower(or safflower) oil
several small cloves of garlic, or 1 large one
cilantro

Blend all ingredients in a VitaMix or blender.
The amounts indicated for ingredients make for a large amount
of dip, so adjust the quantities for a smaller batch.
This dip will keep for 1 week in the fridge.

PLEASE HELP -- Canned/Dry Goods Drive

This is the second season that we are partnering with Pastor W.R. Billips of Brownsville, Brooklyn as the recipient of the leftover produce from our CSA distributions. Each week Pastor Billips drives to the garden at the end of distribution, and volunteers pack boxes of our extra veggies into his truck. Our extra produce is an important infusion of fresh food in the communities of Brownsville and East New York, where families gather on Saturdays to collect our produce to supplement goods from the neighborhood's food pantry. Last week, Pastor Billips told us that the largest food pantry in the neighborhood is struggling to provide for the growing number of hungry members of the community. According to Pastor Billips, the shelves are practically empty. Food pantries across NYC are suffering from funding cuts at a time when more and more families depend on food assistance. As you can imagine, this creates a huge strain on the neighborhood and the many families that rely on emergency food providers to make ends meet.

Increasing access to fresh and nutritious food for people of all income levels is among the CSA's core values, and we'd like to do more to support Pastor Billips and his community in this time of great need. To this end, the CSA will be collecting canned and dry goods during the next 2 distributions to help restock the bare shelves of Brownsville's food pantry. Please, please take some time to look in your kitchen and pick out a few items to donate, or stop by the store and purchase a few items to contribute. Bring your beans, pasta, lentils, etc with you to distribution on June 27 and/or July 4 and look for a big donation box. We're looking forward to growing our partnership with Pastor Billips, and hope this will be the first of many direct actions that can assist his mission of improving the Brownsville community.

We really hope that you're able to contribute!

WHAT: Canned/Dry Goods Drive
WHEN: Distribution - June 27 and July 4
WHY: To supplement the Brownsville Food Pantry and support our partner, Pastor Billips

Season 2009 - Week 4 - Farm Notes from Margaret DeBona

Watch out bugs! Here comes the Row Cover Queen!

If I were to ask you, ‘Who are the greatest foes of organic farming?’ You might automatically start thinking really big. ‘Well there’s the industrial food system, that produces cheap food using pesticides and herbicides.’ Or maybe, you’d think about Monsanto, one of the premier chemical-pushers of modern agriculture, and also the genius behind tons of GMO crops. These giants do their own damage to our food system, but from day-to-day the organic farmer is often concerned with much smaller foes like the Colorado potato beetle, the cabbageworm, the flea beetle, and the cucumber beetle. Though these guys are small they can wreak havoc on your crops turning a tasty bed of arugula greens into an unsightly mess overnight. And that’s where Reemay (or floating row cover, a white super light weight fabric) and I get involved.

At the beginning of the season we were all designated a different ‘area of specialization’. During the week when we aren’t harvesting you’ll see B.R. ripping around on the electric G (one of the specially rigged tractors) cultivating between plants, Devin dragging around different hoses & drip tape for our irrigation, or Miriam plowing a section of field for planting. I was given the title of Row Cover Queen. I already knew that Reemay could protect crops from insects, but was a little unclear as to which crops should be covered when, and for what reasons.

Here are a few bits of information I’ve gathered in the last month. You can plant eggplant and tomatoes a little earlier in the season if you both plant them into black plastic, and cover them with Reemay. Both of these help trap the sun’s heat in the soil, and especially if a late frost is coming you’ll want to cover anything that’s sensitive to cold. So while Solanaceae (nightshades) need to be covered to mimic a warmer climate, Brassicaceae (broccoli, cabbages, radishes, & arugula), which prefer the cooler summer and fall have to be covered because they’re the favorite food of both flea beetles, and cabbage, worms. Just remember you’ll need to uncover any flowering plants so bees can pollinate them. Seems like every family of vegetables has its corresponding six-legged muncher. There’s thousands of them and only one of me, but when your arugula arrives with only a few holes, for one you’ll know its pesticide-free, and second that I’ve been carrying soil bags and unfurling Reemay left & right to keep your veggies warm, snug, and relatively bug free.

Season 2009 - Week 4 - Produce Highlight - Brocolli Rabe

About Broccoli Rabe

Broccoli Rabe (pronounced Broccoli Rob) is also referred to as rabe or rapini. This is another leafy green vegetable that is frequently eaten in Southern Italy and has become popular in the United States. The vegetable has a slightly bitter taste and is frequently steamed or lightly sauteed in olive oil.

The Broccoli Rabe flower looks similar to the broccoli florets. Despite the name this plant is not a type of broccoli but it is in the same brassica family. One of the many health benefits of this vegetable is that it is rich in certain phytochemicals, including sulforaphane and indoles. These are chemicals which are proving to protect us against cancer.


Sauteed Broccoli Rabe with Sun-Dried Tomatoes and Pine Nuts
(Makes 2-4 servings, depending on what you're serving with it. Recipe adapted from Vegetables Every Day by Jack Bishop.)

1 bunch broccoli rabe (about 4 cups washed greens)
1 T olive oil (or more, depending on your pan)
3-4 large cloves garlic, cut into thin slices
1/4 cup sun-dried tomatoes (I used my favorite sun-dried tomatoes for this dish.)
1 T toasted pine nuts
pinch of Aleppo Pepper or your favorite hot pepper flakes
sea salt to season if desired

Wash Broccoli Rabe and spin dry in salad spinner or dry with paper towels. Slice garlic cloves into thin slices. You could rinse sun-dried tomatoes with hot water to remove some of the oil if desired, but I didn't rinse mine.

With stove on medium-high, heat olive oil in large wok or frying pan with deep sides. Add garlic slices and saute about 30 seconds (just long enough to get the garlic flavor in the olive oil, don't let the garlic brown at this point or it will get bitter.) Add broccoli rabe and saute about 2 minutes, until starting to wilt. Add sun-dried tomatoes and hot pepper flakes and saute 2-3 minutes more, until tomatoes are hot and slightly softened and broccoli raab is tender.

While broccoli rabe is cooking, heat pine nuts for 1-2 minutes in dry pan over high heat. They should be barely starting to brown.

Arrange broccoli rabe on serving dish and sprinkle with pine nuts. Season with sea salt if desired and serve hot.

Season 2009 - Week 4 - Recipe - Green Frittata

1 lb. bok choy, chopped
1 lb. fresh spinach, chopped
1 lb. zucchini, diced
1/2 c. butter
1 clove garlic (I use 6)
1/2 c. rice, cooked
4 eggs, beaten lightly
1/2 c. Parmesan cheese
Dash of salt & pepper

Preheat oven to 325 degrees. Mince garlic and saute in butter until flavored. Add 3 greens, saute until crisp-tender. (Hint: Use large pan, add zucchini and bok choy first then cover with spinach and steam for a few minutes.) Add remaining ingredients and blend.

Pour into well greased 8 inch pan. Sprinkle with additional Parmesan cheese if desired. Bake at 325 degrees for 20-30 minutes or until set. Makes 4-6 servings. A great way to sneak your vegetables to the table.

Season 2009 - Week 4 - Produce List

  • Baby lettuce
  • Garlic scapes
  • Baby carrots
  • Green cabbage
  • Japanese turnips
  • Broccoli rabe
  • Summer squash
  • Bok choi